Monday, July 18, 2011
My First 2D Pixel Shader(s) - Part 2
This is part 2 of a 3 part series on 2D Pixel Shaders. For part 1 click here, for part 3 click here.
When left off we had just implemented our grayscale shader. Just as a reminder, since we'll be building on this function, this is what the PixelShaderFunction looked like.
float4 PixelShaderFunction(float2 coords: TEXCOORD0) : COLOR0
{
    float4 color = tex2D(s0, coords);
    color.gb = r;
    return color;
}
I want to take a minute and talk about the type and how we access that type. HLSL allows us to quickly define vectors by specifying a type and an integer between 1 and 4 indicating the number of elements belonging to that vector. As an example float4 is a 4 element vector containing floats. int2 would be a two element vector containing ints. Our color variable could also be specified as:
vector <float, 4> color
You can see how this shorthand greatly simplifies our variable declarations. Since these are vectors there's a lot of neat math tricks we can do with these variables. There's also some per-component access patterns worth mentioning. You can index the individual values of a vector using one of two named sets. The are referred to as the position set (xyzw) and the color set (rgba). You can use any combination of attributes of a named set when accessing a vector however you cannot use attributes from both sets simultaneously.
float4 example = float4(2,3,4,5);

example.g    // returns 3
example.y    // returns 3

example.rb   // returns float2(2,4)
example.yw   // returns float2(3,5)
example.wy   // returns float2(5,3)

example.rgzw // Invalid subscript. Mixes sets.
As you can see you can specify any number of components and in any order as long as that belong to the same set. You can also use this access pattern during assignment.
float4 example = float4(2,3,4,5);

example.yx = example.zw   // float4(5,4,4,5)
example.yz = example.w    // float4(5,5,5,5)
Now that we understand this concept a little better lets jump into some examples.
Color Based Shaders
In this section we're going to focus on a few shader effects we can do only considering color.
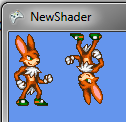
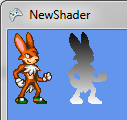
Blackout
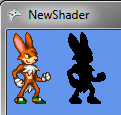
This effect is a bit different from our red block from part 1 because we only want to black out the visible sprite and not the entire texture, making a black box.
float4 color = tex2D(s0, coords);
color.rgb = 0;
return color;
I'll be showing the examples in the rest of this section side-by-side but yours should just look like the one on the right.
In this example you can see we're just assigning 0 to the rgb component of our color vector. The reason this doesn't give us a black box is because we're only modifying the color attributes per pixel and keeping our alpha value. Anything that was previously transparent will also be black but retain its alpha level.
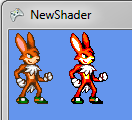
GBR
This effect is super basic but a good example of using the expressiveness of components.
float4 color = tex2D(s0, coords);
color.rgb = color.gbr;
return color;

As you can see we've essentially swapped the values of r and b.
High Contrast
float4 color = tex2D(s0, coords);

float high = .6;
float low  = .4;

if      (color.r > high) color.r = 1;
else if (color.r < low) color.r = 0;

if      (color.g > high) color.g = 1;
else if (color.g < low) color.g = 0;

if      (color.b > high) color.b = 1;
else if (color.b < low) color.b = 0;

return color;
We've introduced a new idea here. The conditional. You can pretty much use these conditionals like you would in C#. I'm not going to go into detail here because I assume you're familiar with if statement. I think now is a good time to make sure you've noticed that the values for the individual floats stored in the vector range from 0 to 1 instead of 0 - 255 as you're probably used to. The main idea behind this effect is that for each of the colors, rgb, we're going to set the value to 1 if it's above some number and to 0 if it's below some number, otherwise leave it alone. This is going to give use strong highlights and shadows. You can easily tweak the high and low variables to get the desired effect or even apply to only one or two of the components.
Negative
float4 color = tex2D(s0, coords);

if (color.a)
color.rgb = 1 - color.rgb;

return color;
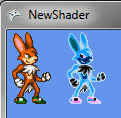
In this function I'm checking if there's an alpha value. I do this because I don't want to apply any color to pixels that are transparent. If the pixel has alpha I subtract the rgb from 1 and assign to rgb. When we do math with multiple components against a scaler it is applied to each component. As an example:
1 - float3(0.2, 0.9, 0.4); // float3(0.8, 0.1, 0.6)
You can probably see how this would give us a negative of our color.
Coordinate Based Shaders
Now that you've seen a few effects you can get from just playing with color values we're going to see what we can do when we include coordinates into the equation.
Rainbow
This first effect is going to be dividing our coordinates into seven pieces to stripe our sprite like a rainbow.
float4 color = tex2D(s0, coords);

if (!any(color)) return color;

float step = 1.0/7;

if      (coords.x < (step * 1)) color = float4(1, 0, 0, 1);
else if (coords.x < (step * 2)) color = float4(1, .5, 0, 1);
else if (coords.x < (step * 3)) color = float4(1, 1, 0, 1);
else if (coords.x < (step * 4)) color = float4(0, 1, 0, 1);
else if (coords.x < (step * 5)) color = float4(0, 0, 1, 1);
else if (coords.x < (step * 6)) color = float4(.3, 0, .8, 1);
else                            color = float4(1, .8, 1, 1);

return color;
Now we're utilizing the coordinates that are being passed in to determine how we want to apply an effect. We're completely discarding the color information and applying a manual color depending on where the pixel is located in the texture. COORD0/coords is also a range of 0 to 1. We're going to create a step variable which is 1.0 divided by the number of stripes we're going to use. You could also multiply the width/height if you wanted to get the actual pixel numbers.
Warning: This shader is not especially efficient. This function will be run once per pixel so you usually want to avoid conditionals but I feel this technique is expressive as far as increasing understanding of coordinate based pixel shaders.
Warning: When applying effects based on coordinates it is important to understand the these effects are applied to the entire texture. If you're only displaying a small portion of your texture via srcRect you'll only see a portion of the applied effect. In this specific example you might only see one color because that segment of your texture might fall within those coordinates. This has the potential to bite you when using sprite sheets, common with animation.
180 Rotate
float4 color = tex2D(s0, 1 - coords);
return color;
Similar to the negative effect above we just subtract the coordinates from 1 and we get a simple 180 rotate.
Horizontal Mirror
float4 color = tex2D(s0, float2(1 - coords.x, coords.y));
return color;

For the mirror effect we just need to subtract coordinate x from 1. You can probably imagine a ton of ways to play around with this to get similar effects.
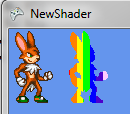
Gradient
float4 color = tex2D(s0, coords);

if (color.a)
color.rgb = coords.y;

return color;
Here we're just setting RGB to the value of coords.y which is going to move from 0 to 1 as we map over the texture.
Conclusion
Today we learned a bit about the vector data type and accessing the different components of those vectors in various ways. We also learned about a variety of different color based and coordinate based shaders we can apply. There's a ton of really fun things you can do with these techniques. Feel free to just make things up and see how it turns out.
In the next part we'll be talking about some more advanced shaders, including passing in parameters, additional textures, and "lighting."
To jump to part 3 click here.